


No matter how good of a surgeon you are, there will come a time when a lens will have to be sutured. There are multiple techniques described for suturing IOLs. In this article, I would like to focus on iris-sutured lenses. This technique works best with a three-piece angulated IOL and 10-0 polypropylene (Prolene) suture on a long curved needle (ie, the CIF-4 from Ethicon). This is an excellent technique for a scenario in which the lens can be placed in the sulcus but it is questionable whether there is enough capsular support to keep the lens secure or when a patient presents with dislocation of a previously placed IOL.
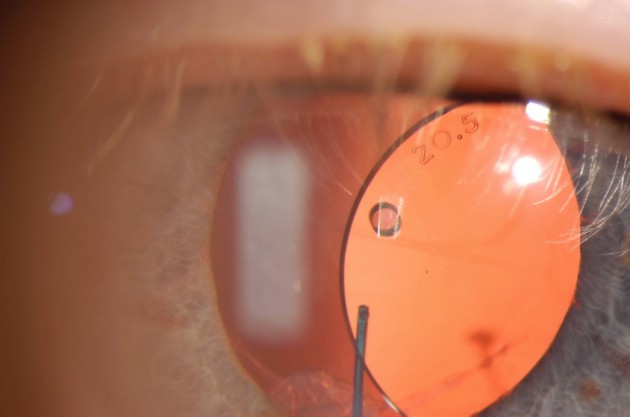
Figure 1. A clinical example of a dislocated three-piece IOL in a patient who underwent cataract surgery in which the posterior capsule was compromised and the lens was placed in the sulcus many years ago.
IOL SELECTION
As far as IOL selection is concerned, almost any three-piece IOL can be iris-sutured, but it is an off-label use of the implant. At this point, almost all modern three-piece IOLs have posterior angulation, which keeps the optic away from the iris after sutures are placed. To minimize chafe on the iris and pigment dispersion, a rounded anterior surface is preferred. I personally have no preference as to material, but many will say that silicone IOLs are preferred over acrylic.
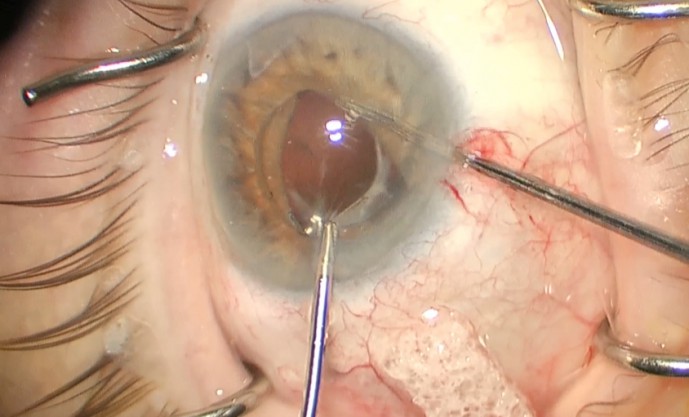
Figure 2. Microforceps are used to elevate and control the haptic while a second instrument is used to help prolapse the iris behind the IOL.
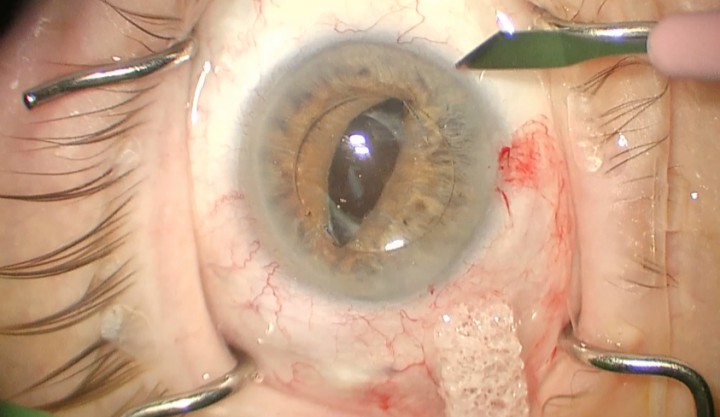
Figure 3. The IOL is fully captured in the iris with the haptic posterior to the iris. A paracentesis is made to facilitate placement of the Prolene suture. Note the angle of the paracentesis.
SURGICAL TECHNIQUE
The first step of this technique is to fill the anterior chamber with an ophthalmic viscosurgical device (OVD). Once filled, capture the optic of the IOL anterior to the iris, so it is better not to dilate or give a miotic once you have control of the lens. Leave the haptics posterior to the iris. I find it helpful to elevate and hold the IOL with intraocular forceps and use a second instrument to “shoe horn” the iris behind the optic. If vitreous is present, it is smart to perform an anterior vitrectomy prior to any additional manipulation; in some cases, the vitrectomy should be done as the first step. Once the optic is captured by the iris, an additional paracentesis may need to be placed to help with suture placement.
The direction of the paracentesis to be used for placing the suture is different from those placed for cataract surgery. Typically, the paracentesis for cataract is directed toward the center of the eye; for an iris-sutured IOL, the direction is almost tangential to the limbus, pointing in the direction that you would like to place the suture. The needle will need some type of incision for the entry wound but can be pushed through the limbal cornea without an exit incision.
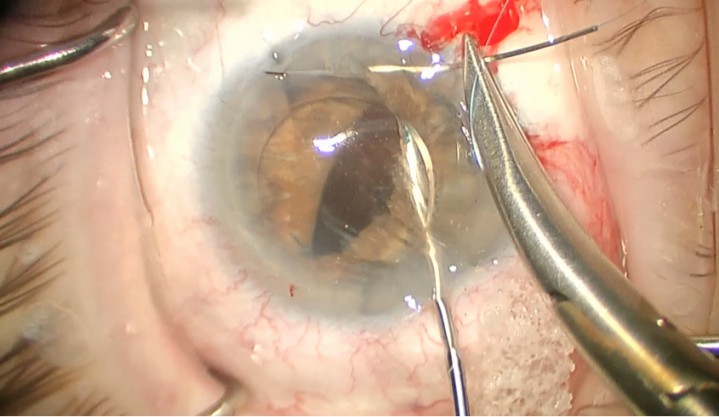
Figure 4. The 10-0 Prolene suture is passed through the paracentesis, through the iris, under the haptic, and out through the iris again. The needle is then pushed and removed through the limbal cornea.
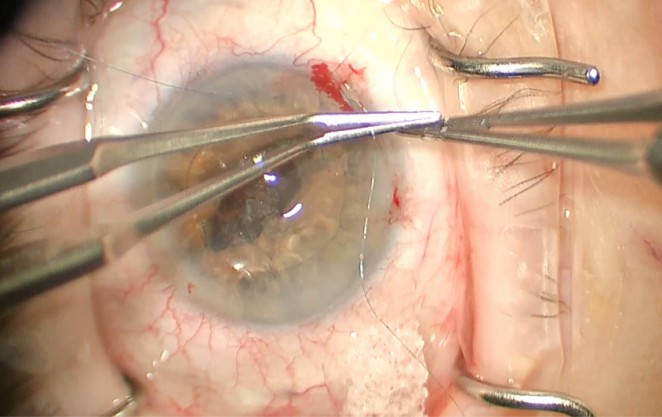
Figure 5. Once the haptic is fixated, the suture can be tired using a McCannel suture or sliding knot, as shown here.
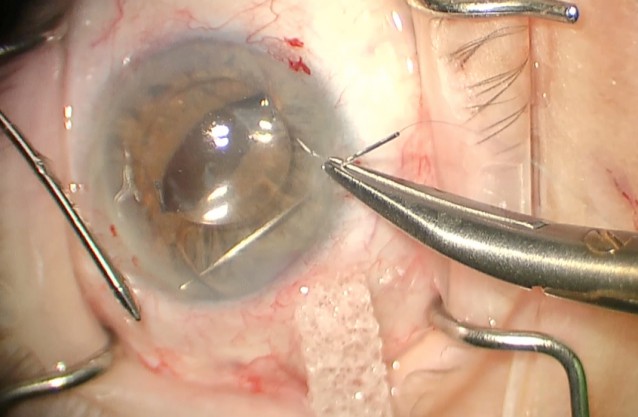
Figure 6. The second haptic is fixated in the same fashion as the first. Note the small and peripheral bite taken in the iris.
When ready, place the Prolene suture through the entry wound pointing toward the haptic of the IOL. I like to elevate the IOL with forceps to help visualize the haptic under the iris. The goal with this suture is to be as peripheral as possible and take as small of a bite of the iris as possible. Keeping the bites small and peripheral will help minimize ovalization of the iris. The suture is placed through the iris, under the haptic, and out through the iris. The needle can then be directed to the limbus and exited from the eye. The Prolene suture can then be tied around the haptic using a sliding knot or externalized through an additional incision and tied using a McCannel technique. This same process is then repeated for the second haptic.
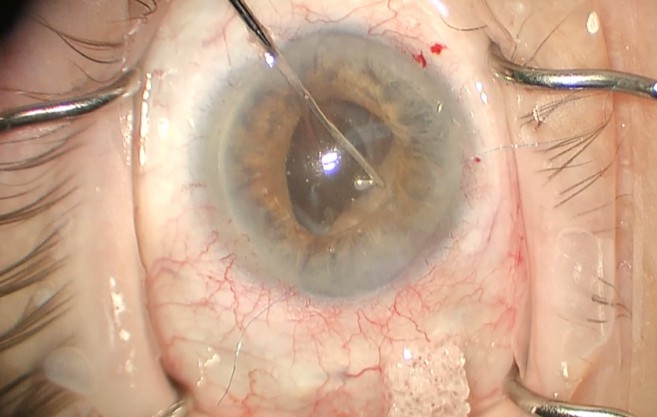
Figure 7. Once both haptic are fixated, the optic can be prolapsed into the posterior chamber. Be sure to remove all OVD from the eye once the lens is deposited and check for vitreous again.
Once both haptics are fixated, the optic is prolapsed back through the iris into the posterior chamber. Any OVD used should be removed with the irrigation/aspiration unit or vitrector. Once the incisions are sealed, the case is finished!
CONCLUSION
At the conclusion of the case, you should have a well-centered IOL and secure wounds. This technique requires minimal to no special equipment and is technically quite easy to perform. Best of luck performing the technique, and feel free to contact me with any questions.
Iris-Sutured IOLs.


